The Allcock’s Aquatic Spider
If I could only fish one type of fly it would have to represent any creature that shows a bit of leg!

In 1911 The Fishing Gazette ran this full-page advertisement featuring the ‘Allcocks Aquatic Spider.’
This floating fly soon achieved legendary status and sold in its thousands accounting for an equally staggering number of fish.
Attractively packaged in its own tin and mounted on an instruction card, it was keenly priced at 1/3d, making it almost irresistible to the fly angler.
Today they fetch anything from £60 to £100 depending on condition.


On advice on how to fish the Spider fly, I can do no better than to quote the instructions on the back its presentation card.
The first two directions advise us on a gut cast and line treatment.
On rivers we are instructed to cast upstream and simply let the insect float down and on lakes we should ‘…allow the spider to float quietly. Do not jerk it about’!
Finally we are told ‘When it is taken, strike AT ONCE’!
I followed these instructions to the letter and had some really good results.


So here is my version with the step-by-step instructions. Bet you catch a big one!
You will need:
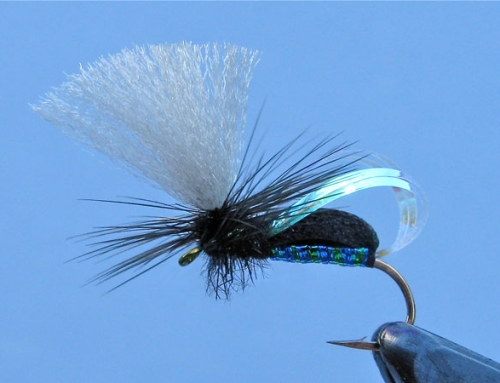
Hook: Kamasan B830 or similar long shank. Thread: Fine. I use Sheer in black.
Body: Veniard’s Booby Eye Foam. Black. Body Covering: Peacock Herl.
Legs: Peacock Sword.
Step One
Place a Kamasan 830 Size 12 (or similar
long shank hook) in the vice and run the
thread down to opposite the barb.
Now bring the thread two thirds of the
way back up the hook and let it hang.
Take a section of 5mm black Booby-Eye
foam and clip the front end to a blunt
point.
Measure the foam against the hook and
trim it so its length is slightly shorter than
the hook shank.
Now trim the tail end of the foam to a gradual point.
Take a pair of sharp pointed scissors and cut a shallow slit the length of the foam.

Step Two
Spread a thin layer of Super Glue along the thread wraps and press the foam down onto the hook so it lodges in the slit. Be sure to leave a small space behind the eye.
Wrap the thread around the foam forming the head and body.
The body should be twice the length of the head.
Whip finish over the wraps, snip the thread and reattach at the rear of the body securing the foam.

Step Three
With the thread now at the rear of the body tie in 6-8 strands of Peacock Herl on top of the hook and the same below so that all the strands protrude both in front and behind the hook.
Whip finish and reattach the thread behind the head.

Step Four
Grasp the herl strands that are facing forward and carefully tie them down behind the head making sure they are spread evenly around the body.
Trim the waste.
Now take the herls that are facing backwards and bring them forward to the same tie in point filling any gaps in the body.
Tie down and trim the waste.

Step Five
Tie in two pairs of Peacock Sword legs.
One pair either side of the body facing backwards.

When snipping pairs of sword herl from the feather it pays to leave them attached to the quill as this will help keep them in position when tying in.
Trim the waste.

Step Six
Move the thread to behind the eye and tie in three strands of Peacock herl, move the thread back to behind the head.
Twist or plait the herl to form a rope, coat the foam head with varnish and wind the rope back to behind the head.
Tie down the herl and trim the waste.
Tie in a pair of legs facing forwards either side of the head.
Trim the waste; add a little varnish whip finish.

Step Seven
Enjoy!