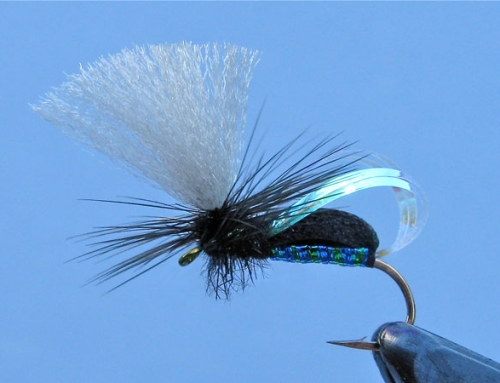
The Simple Mayfly
If you belong to one of those fishing clubs that only allows you to fish a floating fly, you have my deepest sympathy! I spent many years fishing these strictly controlled waters until I came to my senses and joined a syndicate on the beautiful River Avon that not only allows you to fish for the occasional Salmon but also offers the coarse angler two beautiful lakes and more miles of the Avon than one will ever need.
The Barbel, Tench, Carp and Perch are just some of the species for which we try. However, during the Mayfly each year it is not exactly hard work to find those crafty old Trout.
I remember when I first started fly fishing I was doggedly casting up stream and then whipping the fly off the water before it passed me in an attempt to stay within the local rules. As I dried the fly and prepared for the next cast the keeper’s voce behind me suggested…. “Next time, let the fly sink for a moment and then strip it back underwater. They can’t touch you for it!”
I cast again, the fly floated for a moment then a large Trout tried to take it but missed.
The fly sank, but as I stripped it in underwater, it was taken by a rather large Brown trout that I landed and accompanied to the local smokers!
The keeper smiled and said “Mmmm…Greedy little buggers aren’t they?”.

Here follows that Simple Mayfly pattern that I found many years ago.
It continues to serve me well.
You will need:
Hook: Tiemco 2488 or Kamasan B160. Size 12.
Thread: Cream 8.0.
Tail: 3 Paint Brush Bristles.
Detached Body: 2 mm thick cream closed-cell foam.
Wing: Aero Dry Wing. Medium Dun.
Hackle: 3 CDC feathers. Colour of choice.
Step One
Place a sewing needle in the vice and tie in three paintbrush bristles on top of the needle.
Leave a long tag of thread hanging towards the vice head.
Tie in a slim wedge of closed cell foam, securing it by the very tip of the narrow end.
Take your thread under the foam and once around the needle.
To make the first small segment wrap the thread back up and around the foam twice, making sure all materials are kept on top of the hook.

Step Two
Continue with this method along the needle making a total of 6 segments that gradually increase in size.
Whip finish behind the 6th segment and snip the thread.
Now use a fine felt pen and mark the body as shown, each side.
When the ink is dry take a firm grip with finger and thumb and slide the body off the needle.
REMOVE THE NEEDLE FROM THE VICE.
Keeping a grip on the rear of the body gently pull the thread you left hanging and the body will take on the curve of the natural.

Step Three
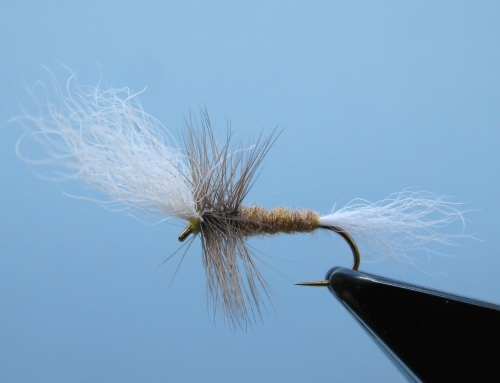
Put the hook in the vice, run the thread half way down the hook and tie in the extended body making sure it stays on top of the hook and that the tails are level.
Remember that the body tie in point must leave room for the wing and the CDC hackle.
Comb out the Aero Dry Wing and tie in with figure of eight wraps.

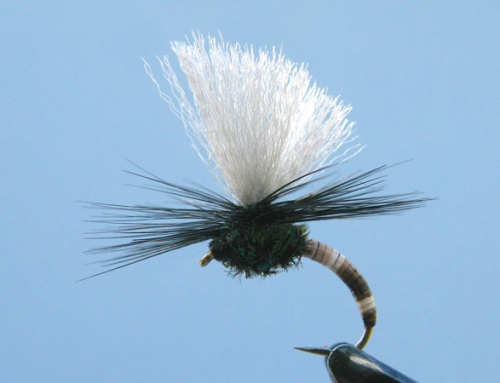
Step Four
Hold both sides of the wing upright and make a few tight turns around the base.
If you prefer a split wing, make a figure of eight wrap between the wings letting the thread hang behind them.
If you have a feather folding device, (e.g. Mark Petitjean ‘Magic Tool’) fold 3 CDC feathers into the block, remove them with the clip and cut off the spines. Place them into a split thread or dubbing loop.
If you don’t own a Magic Tool carefully place 6 CDC feathers together, grip with a large bulldog clip, cut off the spines and follow the same procedure.
Spin the loop and wrap the dubbing forward, about 3 wraps behind the wing, and 2 in front.
Hold the wings up and cut to length.
Whip finish and you’re all set.

Tie it… try it… and please catch a large one!